Dagger 2 for Dependency Injection in Android
Hello Friends,
Here we see about dagger 2 dependency injection setup and implementation
What is Dependency:

What is dagger:
Dagger is a compile-time framework for dependency injection.A fast dependency injector for Android and Java.
Following annotations used for Dagger 2:
@Module and @Provides: define classes and methods which provide dependencies
@Inject: request dependencies. Can be used on a constructor, a field, or a method
@Component: enable selected modules and used for performing dependency injection
Step 1: Gradle dependencies getting from below website
https://github.com/google/dagger#gradle
dependencies {

  api 'com.google.dagger:dagger:2.x'
  annotationProcessor 'com.google.dagger:dagger-compiler:2.x'
  api 'com.google.dagger:dagger-android:2.x'
  api 'com.google.dagger:dagger-android-support:2.x' // if you use the support libraries
  annotationProcessor 'com.google.dagger:dagger-android-processor:2.x'

}
Update latest dagger version using your project structure panel as per the below screenshot

Step 2: Create a AppController class and add the application attribute in the manifest.xml


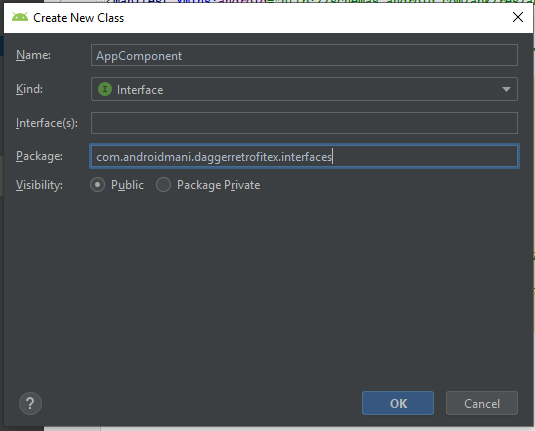
Step 3: Create a new interface called AppComponent and add below annotations
@Singleton
@Component()
Then create the inject method with MainActivity class

@Singleton  //Singleton annotation
@Component()    //Dagger component annotation
public interface AppComponent {
    //Activity    void inject(MainActivity mainActivity);     //injected mainactivity class
}
Step 4: Create an object for app-component class into the app-controller

public class AppController extends Application {

    private static AppComponent appComponent;

    @Override    public void onCreate() {
        super.onCreate();
        appComponent = DaggerAppComponent.builder().build();
    }

    public static AppComponent getAppComponent()
    {
        return appComponent;
    }
}
(Note: DaggerAppComponent class is an auto-generated file. We can access this file after Rebuild the project)
Step 5: Open the MainActivity class and initialize the injection
//Initialize the injection
AppController.getAppComponent().inject(this);

Step 6: Here we are creating a Utilities class and inject into the main-activity

Create a boolean method for Network connection check. Its accessing for the whole application activities and fragments using the dagger injection
public class Utilities {

    private Application app;

    public Utilities(Application application) {
        this.app = application;
        AppController.getAppComponent().inject(this);
    }

    //Checking for Active Network Connection    private boolean isNetworkConnected() {
        ConnectivityManager cm = (ConnectivityManager) app.getSystemService(Context.CONNECTIVITY_SERVICE);
        return cm.getActiveNetworkInfo() != null && cm.getActiveNetworkInfo().isConnected();
    }
}

Import Access network state permission for internet connection status
<uses-permission android:name="android.permission.ACCESS_NETWORK_STATE"/>

Step 7: Create a module class called AppContainerModule the provide the Utility class using @Provides annotation
@Module
public class AppContainerModule {

    @Provides
    @Singleton
    Utilities providesUtilites(Application application) {
        return new Utilities(application);
    }

}

Step 8: Add the app-container class in the component
@Component(modules = {AppContainerModule.class})    //Dagger component annotation
public interface AppComponent {
...
}

Step 9: Create Application Module and added in app-component

@Module
public class AppModule {
    private final Application application;

    public AppModule(Application app) {
        this.application = app;
    }

    @Provides
    @Singleton
    public Application getApplication() {
        return application;
    }
}

Step 10: Add the app-module class in the component and set app-module in Dagger builder in App-controller
@Singleton  //Singleton annotation
@Component(modules = {AppModule.class, AppContainerModule.class})    //Dagger component annotation
public interface AppComponent {
...
}

public class AppController extends Application {

    private static AppComponent appComponent;

    @Override    public void onCreate() {
        super.onCreate();
        appComponent = DaggerAppComponent.builder()
                .appModule(new AppModule(this)) //Set application module                .build();
    }

    public static AppComponent getAppComponent()
    {
        return appComponent;
    }
}

Validate the internet connection using Utilities injection in MainActivity
public class MainActivity extends AppCompatActivity {

    @Inject    Utilities utilities;

    @Override    protected void onCreate(Bundle savedInstanceState) {
        super.onCreate(savedInstanceState);
        setContentView(R.layout.activity_main);
        //Initialize the injection        AppController.getAppComponent().inject(this);

        checkInternet();

    }

    private void checkInternet() {
        if(utilities.isNetworkConnected())
        {
            Toast.makeText(this, "Internet connected", Toast.LENGTH_SHORT).show();
        }
        else        {
            Toast.makeText(this, "No internet connection", Toast.LENGTH_SHORT).show();
        }
    }
}

Result in android device

Source code download here : https://github.com/AndroidManikandan5689/Dagger2-Injection-android
Happy coding...😊
Comments
Post a Comment